In this article, I’m going to show you, in 9 simple steps, how to prepare the ground for turf and grass seed.
It doesn’t matter if you’re laying turf, or sowing grass seed, the ground preparation is exactly the same.
The secret to creating a beautiful lawn is thorough preparation. As such, it’s worth taking the time to do it properly.
If you rush and make a mess of the preparation, even the best grass seed or the best turf won’t help.
The Best Time of Year For Preparing Ground For Turf or Grass Seed
In order to create the best looking lawn you can, you should allow yourself plenty of time to prepare the ground.
Generally, Autumn is the best time for laying turf or sowing grass seed.
The soil is warm from the Summer’s sun, there are very few weed seeds in the air and the rain comes to help water the area and encourage quick establishment and growth.
So, September and October are always good months.
I like to give myself a good 8 weeks to prepare the ground so if you plan on creating your new lawn in September, start preparing the ground in July.
Even if you don’t create your new lawn until October, the hard work will have already been done.
How to Prepare the Ground For Turf or Grass Seed, Step-by-Step
The video below from Rolawn shows how to prepare the ground, step-by-step.
Preparing the ground for grass seed or turf is fairly straight forward although it can be hard work. You should take your time and be as thorough as possible.
For best results, give yourself a couple of months to do it. You can do it quicker but the results won’t be nearly as good.
Step 1: Remove Old Turf, Plants and Weeds
The first thing to do is clear the area where your new lawn is going to be laid or sown.
You should remove every last piece of plant material from the area.
Spray the area with a Glyphosate-based weed killer. Choose one that breaks down on contact with soil like Elixir’s Glyphosate Weed Killer Concentrate.
Wait for 2-3 weeks until the whole area has died off and gone brown before removing the old lawn, plants or weeds with a spade or turf cutter.
No products found.
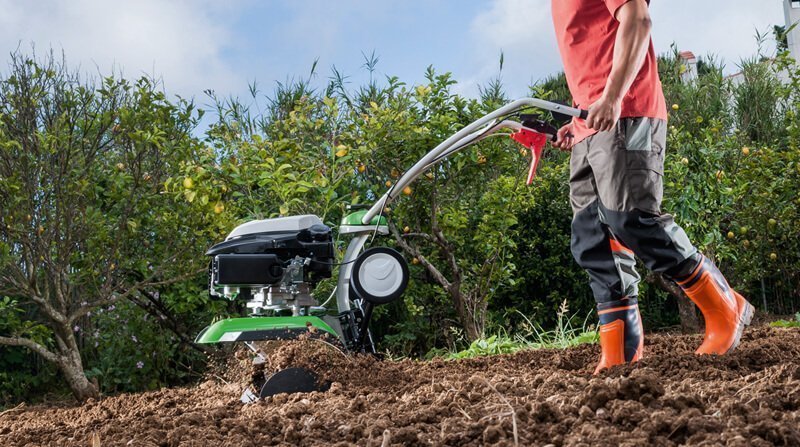
Step 2: Rotavate the Soil
Once you’ve cleared the area and killed any remaining weed, grass or plant seeds, you need to turn the soil over.
Do this with either a gardening fork, spade or mechanical rotavator.
Dig or rotavate to a depth of at least 15cm (20cm – 25cm is even better) and remove as much debris as possible – rubble, roots, stones etc.
If there isn’t enough soil to dig at least 15cm deep, you’ll need to add some.
I really like Rolawn’s Turf and Seeding Topsoil as it comes with pre-seeding fertiliser already added.
Step 3: Decide Whether You Need a Soil Improver
This does take more time and also adds to the expense of creating a new lawn. As a result, many people skip this step.
However, it makes a huge difference in how well your lawn establishes and grows in the long term. As such, I advise you to improve your soil if you can.
Heavy, Clay-Like Soil
If your soil is heavy and clay-like, add some fine gravel to improve drainage and add compost or well-rotted organic matter to add nutrients which your soil might be deficient in.
Sandy Soil
If your soil is sandy and free-draining, add some compost or well-rotted organic matter to improve water retention. This will add nutrients and also help to keep moisture in the soil where it can be used by the new grass.
No matter if you have clay-like soil or sandy soil, the addition of compost will always help. I like to use Rolawn’s Soil Improving Compost for larger areas but any compost, well-rotted organic material or manure will do.
To mix it into the soil, spread it over the surface and turn the soil over again with a fork, spade or rotavator.
Step 4: Level the Area
In many ways levelling the area is the hard part.
The flatter you can make the area, the better your lawn will look when it’s laid.
Take a landscaper’s rake and break up any clumps of soil. Rake the area flat until the whole area is as even as you can get it.
However, using a rake to level the soil will only get you so far.
The video below shows you how to level soil before laying turf or sowing seed with a tool called a ‘Lute’ made with a few bits of wood.
It’s very simple but very effective:
This will create a surface which is as flat as possible.
Step 5: Tread the Soil
Once you’ve levelled the soil, it’s time to tread it, or ‘heel it’ as some people say.
This involves treading the soil with very small steps with your weight over your heels to firm up the soil. Do this a few times in different directions.
Treading is really the only way to firm up the soil and you need to be thorough. You cannot skip this part. If you don’t do it, the ground will settle as it rains and your lawn will become bumpy and uneven very quickly.
If there are places that sink, add soil to them and tread those areas again to make the ground as level as possible.
Step 6: Leave the Area to Settle
This step isn’t strictly necessary if you’re laying a family or utility lawn. However, if you like to do a job well, it’s worth taking the extra time.
Water the area thoroughly and let the area settle for a least 48 hours.
If you’re a perfectionist and not in a rush, leave the soil open to the elements and let it settle for a period of 2-4 weeks.
If you heel the soil and lay turf immediately, the soil underneath can settle slightly over time, creating undulations in the lawn. For a perfectionist will an ornamental lawn, this will not do.
After a few weeks, water the area again (or the rain might help if you’re lucky) to see if or where the ground puddles.
Puddles form in low spots so these are the areas that need attention. Either add soil to those areas or flatten the high spots.
You can do this by using either a heavy roller or heeling again.
For normal family and utility lawns, this step isn’t really necessary.
Step 7: Add a Pre-Seeding Fertiliser
It’s important to get the chemical nutrients into the soil before laying turf or sowing grass seed.
So, add a pre-seeding fertiliser to the soil.
I use Rolawn’s GroRight Lawn Establishment Fertiliser.
Step 8: Rake the Soil
Once you have applied a fertiliser, rake it into the top 25mm of soil.
Rake the soil to a fine finish. The finer the soil is, the better contact it will have with the turf when you lay it or the grass seed when you sow it.
Step 9: Water the Soil
Now you’ve prepared the ground and you’re waiting for your turf or grass seed to arrive, it’s a good idea to water the soil.
This will activate the fertiliser and the moisture will provide good contact between the soil and turf or seed.
It’ll also help the roots establish.
In Conclusion
Like any other job, the end result is only as good as the preparation that has gone before it.
If you rush the prep, the final result won’t be very good. However, if you take your time and do it right, you newly laid turf or seeded lawn will be a thing of beauty.
The good news is that preparing the ground for laying turf or sowing seed is a simple task. There’s nothing complicated about it but it does take time and hard work if you want to create the best finish you can.
